Hairline cracks in ceilings are one of the most common cosmetic problems in UK homes and in most cases, the easiest to repair properly. The key word is correct. A poorly applied repair filler without proper surface preparation, painted over before it has fully cured, or applied to a crack that is still moving – will look worse than the original crack in a few months and leave the ceiling in a worse condition than when you started.
Before you pick up a tube of filler, it is worth spending a few minutes properly assessing the crack. Not every hairline ceiling crack requires the same approach, and identifying the nature of the crack before you repair it will determine whether the repair will last.
Are Hairline Ceiling Cracks Dangerous?
Most hairline ceiling cracks are cosmetic rather than structural. They are caused by normal settlement and thermal movement of the building over time, the natural ageing of the plaster, or vibrations from traffic or construction work. A single, fine, stable hairline crack in an otherwise sound roof is not a structural concern and does not indicate that the roof is at risk of failure.
Cracks that require more attention are those that are wider than about three millimeters, that run diagonally across the roof rather than following a straight seam, that have a visible sag or bow in the roof surface, or that have been growing since they first appeared. If your crack has any of these characteristics, the appropriate first step is an evaluation rather than a repair.
Our companion article on what causes hairline cracks in roofs and when to worry covers the diagnostic process in detail, and is worth reading before proceeding if you’re not sure what you have. If your crack is good, stable, hasn’t changed in the way you knew it would for weeks, and is sitting on an otherwise solid roof, you’re dealing with a cosmetic repair. The rest of this guide covers how to do it properly.
Before You Repair: How to Assess the Crack Correctly
Look at the crack carefully before touching it. Note its width at its widest point, how long it runs, whether it branches, and how the surface of the roof in the surrounding area looks. Gently tap the roof around the crack: Well-bonded plaster makes a consistent, slightly dull sound; plaster that is away from the structure behind will feel hollow and will flex slightly with light finger pressure.
If there are hollow sections around the crack, those sections need to be addressed as part of the repair. You can’t successfully fill a crack on a surface that isn’t properly bonded, because the filler will move with the loose plaster and crack again. Also check for any discoloration around the crack: Yellow or brown stains indicate moisture from above, which needs to be investigated and removed before any surface repair can be attempted. Filling a crack in a ceiling will cause the repair to fail within weeks.
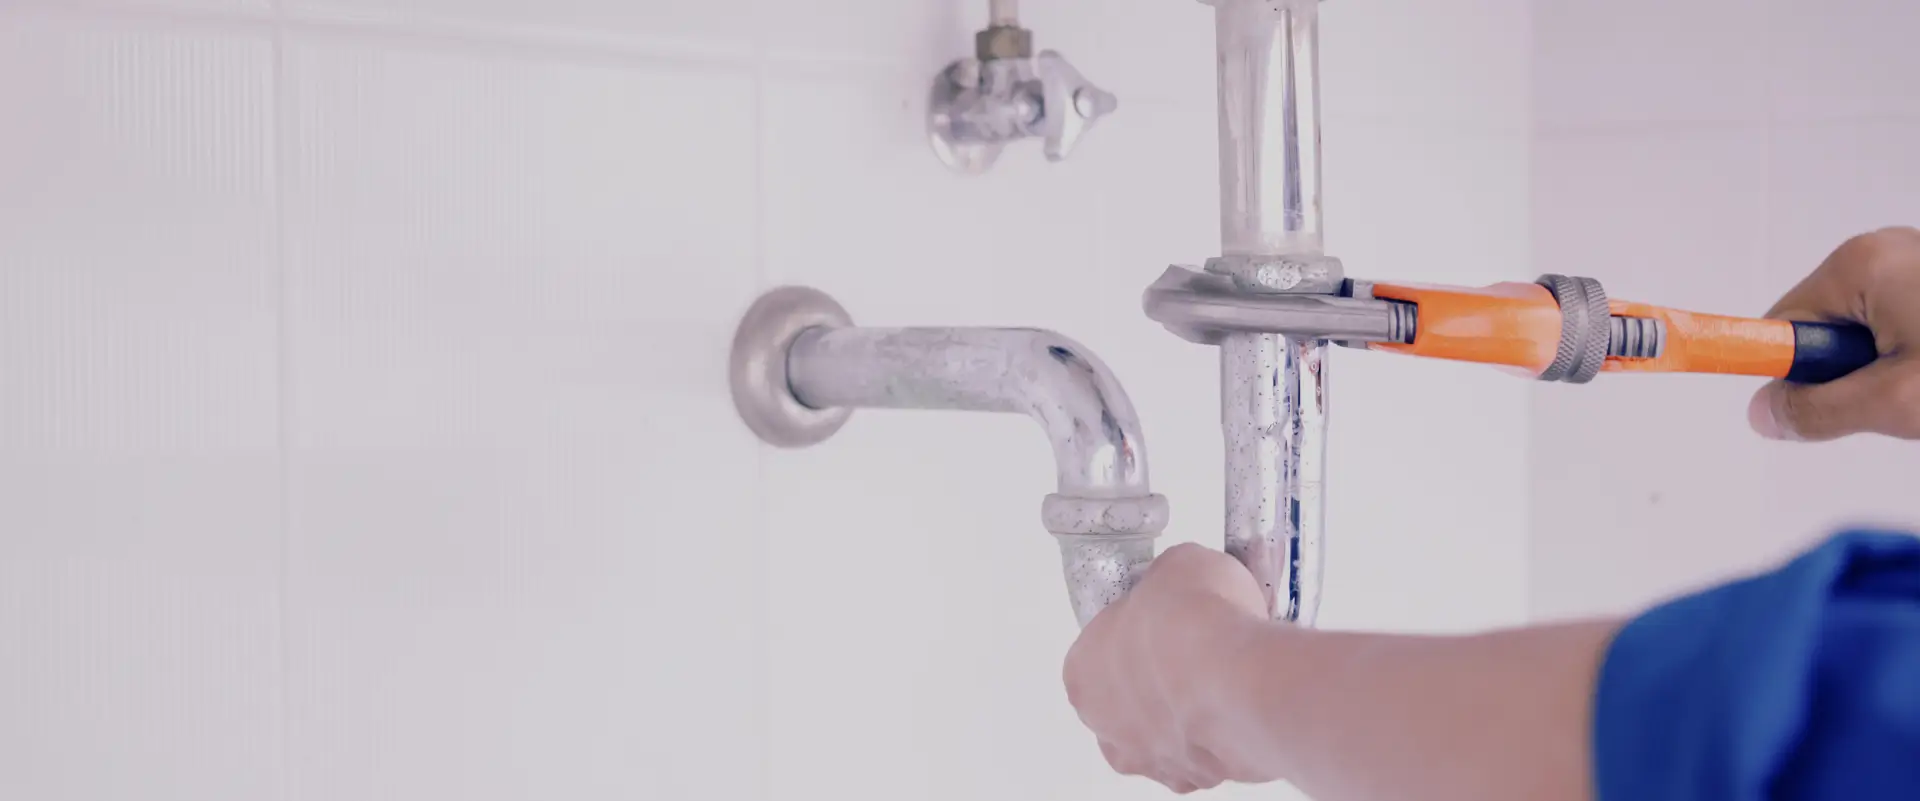
What You Need to Repair a Hairline Ceiling Crack
Fillers and Which One to Choose
For a true hairline crack in stable, well-bonded plaster, a fine surface filler is the right product. Fine surface fillers are specifically made for hairline repairs and produce a smoother, less visible result than standard all-purpose fillers, which can appear grainy through the painted finish on the ceiling.
For cracks at the junction between the ceiling and wall – at the cornice line or other places where there is a possibility of some movement, a flexible decorator’s caulk works better than rigid filler over time. Rigid filler in moving joints will crack again at the time of repair. The caulk can accommodate some seasonal movement at the junction without breaking.
For larger cracks or areas where the plaster surface has fallen beyond the hairline, skim-mix filler or patching plaster is more suitable than fine surface filler, which is not designed to fill in depth.
Tools for the job You will need a flexible filling knife (narrow for fine cracks, wide for feathering the edges), a small paintbrush for wetting the crack, fine grit sandpaper (about 180 to 240 grit), a sanding block for a flat result, a dust sheet to protect the floor, a stepladder at a comfortable working height, and primer and matching ceiling paint for the final stage.
Check Also: Different Types Of Window Blinds: Home, Office & More
Step One: Preparing the Surface Around the Crack
Surface preparation is key to whether or not the repair will last. Don’t skip it. Gently scrape the crack with the edge of your putty knife to remove any loose material. You want the crack to be slightly open, rather than trying to fill a sealed surface where there’s nothing for the filler to grip.
Remove any dust inside the crack with a small dry paintbrush, then lightly dampen the crack and surrounding area by applying clean water to the brush. This prevents the dry plaster from drawing moisture from the filler too quickly, causing it to dry against the weak surface skin and dry out instead of drying properly.
If the crack is at a ceiling-to-wall junction, run the edge of your putty knife along the existing filler or paint to remove anything that isn’t firmly bonded. A fresh, clean surface will hold the filler better than a painted surface that has been filled several times before.
Step Two: Applying the Filler Correctly
For thin-surface filler, mix it to a smooth, lump-free consistency if using a powder type, or apply directly from the tube or tub if using a ready-mixed product. Press the filler firmly into the crack using a filling knife, working along the length of the crack to ensure the full depth is filled. Remove excess from the surface, leaving the repair as flush with the surrounding ceiling as possible.
Allow the first application to dry completely. Time varies by product and depth of fill, but under reasonable conditions a fine-surface repair on a hairline crack will typically be dry to the touch within one hour and ready for sanding in two to three hours. Check the product instructions. Most hairline crack repairs will benefit from a second, very thin application after the first has dried and lightly sanded. Filler shrinks a lot as it dries, and the second coat will address any small indentations left by the first coat.
Apply the second coat thinly and feather the edges outward onto the surrounding ceiling surface so the repair blends in rather than sitting proudly. For caulk repairs at the junction line, smooth the caulk in a single, continuous bead with a wet finger, and allow it to roll upward from top to bottom before painting. Do not apply paint until a skin forms on the caulk; the paint will pull the caulk off and leave an uneven finish.
Step Three: Sanding, Priming, and Painting
Once the repair is completely dry and hardened, lightly sand with fine-grit sandpaper on a sanding block to achieve a smooth, flat surface that is flush with the surrounding ceiling. Work in a circular motion and check the surface under a rake light – a torch held at a low angle to a window or surface – to identify any areas that need extra attention before painting. Wipe off all sanding dust with a slightly damp cloth and allow to dry.
Apply a coat of primer or a thin first coat of ceiling paint to the repaired area before applying a full finish coat. Skipping the primer step on a fresh filler repair often results in a different patch of ceiling than the surrounding ceiling even after the finish coat – fresh filler has a different porosity to the painted surface and without a first seal coat the finish coat will absorb unevenly.
If you want an invisible result, apply a finish coat of ceiling paint to the entire ceiling rather than just the repaired area. Applying paint to a single patch of ceiling, especially on a ceiling that has been painted several times, will almost always look slightly different in certain lights. A full ceiling coat is the surest way to achieve a consistent finish.
Why Do Ceiling Cracks Keep Coming Back?
A crack that has been properly filled but returns within a few months is almost always caused by one of three things. The crack is in a place where there is ongoing movement – a junction line, a plasterboard joint, or a condition where the building moves slightly with temperature and humidity – and the rigid filler cannot accommodate that movement. The filler was applied without adequate preparation and has not bonded properly to the substrate. Or there is an ongoing moisture problem above or within the ceiling that is preventing the repair from curing properly and affecting the plaster.
Flexible caulk is needed to fill cracks instead of rigid filler. Improperly bonded repairs require the surface to be properly cleaned and primed before reapplication. Moisture-related failures require the source of moisture to be identified and eliminated before any surface work is completed. A recurring crack despite multiple repair attempts tells you that the cause has not been addressed. Continuing to fill it will not solve the underlying problem.
When Filling Is Not Enough and the Ceiling Needs Professional Attention
There are situations when filler is not the right tool for the ceiling, no matter how carefully it is applied. Where the plaster over a significant area has flaked, is pulling away from the structure, or has aged to the point where it no longer provides a stable, consistent surface, a proper repair is re-skimming rather than filling. Re-skimming involves applying a thin, even coat of finish plaster to the ceiling surface (or a portion of it) to create a fresh, consistent base that will carry the decoration cleanly and evenly.
This is not a DIY job for most people: It takes practice and the right tools to get a flat, blemish-free skim coat on the ceiling, and a poorly applied skim coat is much harder to repair than a poorly filled crack. A water-damaged ceiling will need to be cut out and replaced with the damaged section. Wet plasterboard loses its structural integrity and the paper on its surface delaminates – neither of which respond well to filler or skim coat applied over it.
If your ceiling has large cracks, areas that look patchy when tapped, a surface that has been patched multiple times with inconsistent results, or any signs of water damage, it is wise to have a professional assess what the ceiling needs before purchasing materials for a repair that may not last. Our plastering service includes ceiling crack repair, patch work and full re-skimming. Where decoration comes after the repair, our decorative work service can be integrated with the plastering to ensure that both stages are carried out in the correct order and to a consistent standard.
If you would like a direct estimate of what your roof repair involves and how much it is likely to cost, get in touch via our contact page.
Read Next: What Electrical Work Can You Do Yourself In The UK?