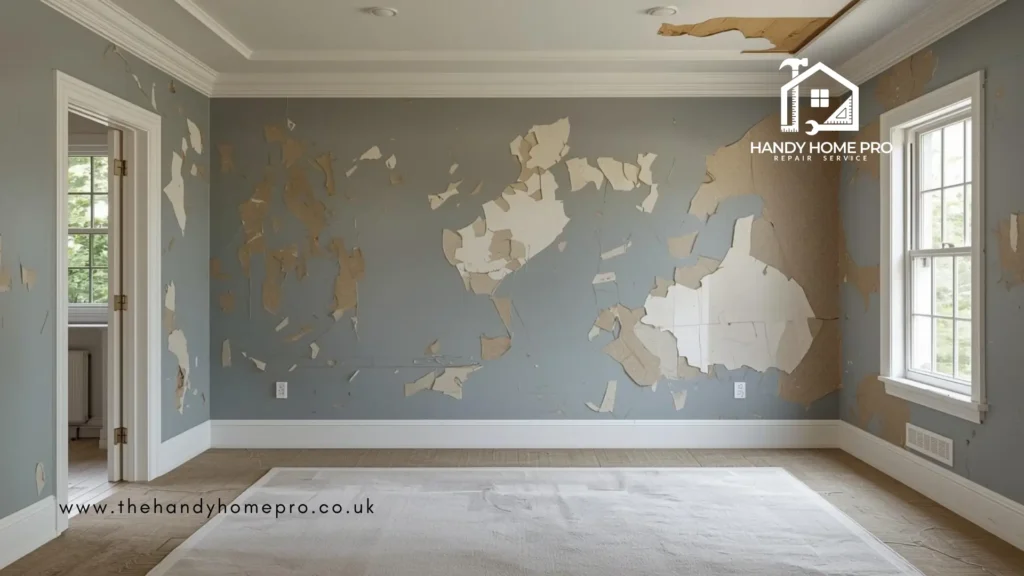
Paint that fails on a wall or ceiling is never just a cosmetic inconvenience. It is a signal that something underneath the surface is not right. Whether your paint is peeling at the edges, blistering in patches, or showing a network of fine cracks across the surface, each of those patterns has a specific cause, and understanding which cause you are dealing with is what determines what actually needs to happen before you redecorate.
Painting over a failing surface without addressing what caused it to fail is one of the most reliable ways to waste money on home improvement. The new coat looks fine for a few weeks, sometimes a few months, and then the same problem appears again, usually over a larger area because the underlying issue has continued to develop while hidden beneath fresh paint. Getting this right the first time is almost always cheaper than doing it twice.
Why Paint Problems Are Always Worth Understanding Before You Redecorate
Redecorating is one of the most common home improvement projects, and it is also one of the most frequently underestimated. The painting itself is only part of the job. The quality of the result, and how long it holds, depends almost entirely on what happens before a brush touches the wall.
The most common reason that a freshly decorated room starts to look tired or damaged within months of completion is that the preparation stage was either rushed, done incorrectly, or skipped entirely where it mattered most. Problems that existed in the surface before the paint went on do not disappear under a new coat. They work their way back through.
This matters not only aesthetically but commercially. If you are preparing a property for sale, for rent, or for a long-term refresh, the decorating needs to hold up, not just look acceptable on the day of completion. A surface properly prepared and finished to a professional standard will last years. A surface painted over without adequate attention to what is underneath it will start to deteriorate significantly sooner.
What Causes Paint to Peel Away From a Wall or Ceiling?
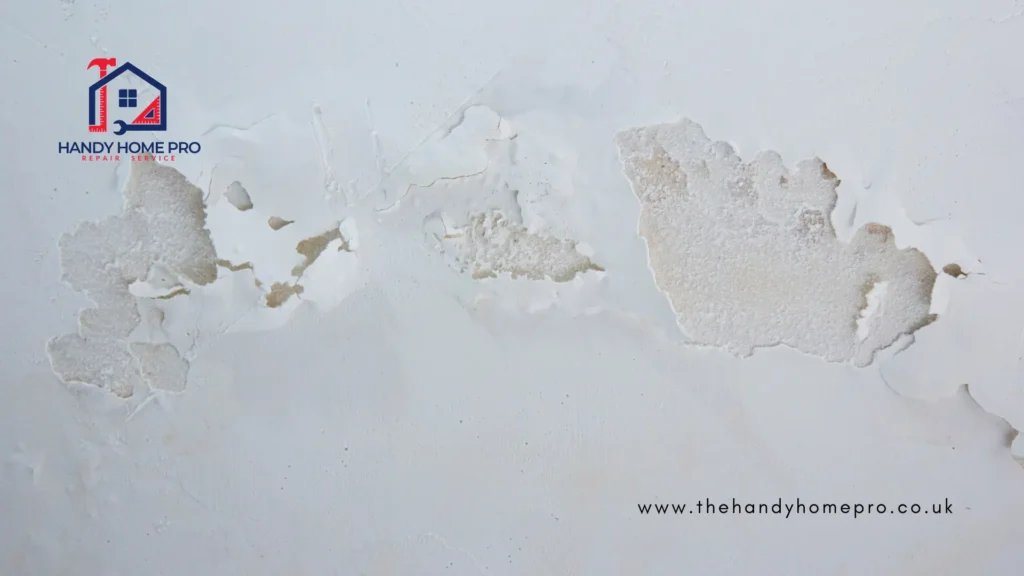
Peeling paint, where the paint film separates from the surface and lifts away in flakes or sheets, is caused by a failure of adhesion between the paint and the surface beneath it. That failure almost always has one of four root causes.
Moisture Behind or Within the Surface
This is the most common cause of peeling paint, particularly in bathrooms, kitchens, and on external walls or walls adjacent to an external facade. When moisture is present in or behind the substrate, it works against the bond between the paint film and the surface. The paint may adhere initially, but as moisture moves through the wall and reaches the surface, it pushes the paint away from beneath.
Paint peeling in a bathroom that keeps returning despite repainting, peeling around window reveals on an external wall, or peeling at the bottom of a wall near floor level are all strongly suggestive of a moisture cause. In bathrooms, the moisture is often coming through failed sealant around a bath or shower that has allowed water into the wall behind the tiles. On external walls, it may be condensation, penetrating damp from outside, or a plumbing fault within the wall. The moisture cause must be resolved before any new decoration will hold. Painting over it again simply delays the recurrence.
If you suspect moisture is behind a paint failure but are not sure what is causing it, our earlier article on what causes damp, condensation, and mould in a UK home covers the diagnostic process in detail.
Paint Applied Over a Poorly Prepared Surface
Peeling paint is also common where the surface beneath the new coat was not properly cleaned, degreased, sanded, or primed before painting began. Dusty surfaces, greasy patches in kitchens, glossy surfaces that have not been adequately keyed, and plaster that has not been correctly sealed will all result in a poor bond between the new paint and the substrate.
This type of failure often presents as peeling that can be peeled back easily in large sheets, rather than the more localised blistering associated with moisture. It tends to appear across a wider area of the room rather than in specific spots, and is often found where a previous decorator has taken shortcuts with the groundwork.
Incompatible Paint Layers Over Time
A wall that has been decorated multiple times across decades may have layers of different paint types on it: old oil-based gloss or eggshell beneath water-based emulsions, or flaking limewash under modern vinyl paints. Where incompatible layers sit on top of each other, the bond between them is inherently weaker than the bond each layer has to a clean substrate. Eventually, usually when a new coat of paint is applied and the surface is disturbed, the incompatible layers separate.

This is a less immediately obvious problem to diagnose than moisture or poor preparation, but it becomes apparent when you start stripping back the wall and find multiple different paint types, or when peeling occurs in large, flat sheets that reveal a smooth, glossy surface beneath rather than bare plaster.
Paint Applied to a Surface That Was Too Cold or Too Damp
Paint needs to be applied within specific temperature and humidity conditions to adhere and cure correctly. Applying emulsion to a wall that is cold, recently plastered, or damp because of recent construction work or winter conditions can result in poor adhesion and subsequent peeling even if the surface looked fine at the time of application. New plaster that has not fully dried, in particular, is a common cause of peeling paint that appears within months of a renovation.
Why Does Paint Bubble or Blister on Walls?
Bubbling or blistering paint, where the surface forms raised pockets rather than peeling away in sheets, is almost always a moisture problem, though the moisture may be arriving from a different direction than you expect.
When moisture is trapped between the paint film and the substrate, or when moisture within the wall pushes outward through the surface as it tries to evaporate, it forces the paint away from the wall in localised raised patches. These blisters may be small and scattered, or they may be large and soft to the touch, depending on how much moisture is present and how quickly it is moving.
Bathrooms are the most common location for blistering paint because of the volume of warm, moist air produced by showers and baths, particularly where ventilation is inadequate. Blistering can also occur on ceilings directly below a bathroom on an upper floor, where a slow leak from plumbing or from a failed shower tray seal has allowed moisture to saturate the ceiling structure.
In kitchens, steam from cooking that vents across walls rather than being extracted properly can cause blistering on the wall surface closest to the hob. On external walls in older properties, particularly those without effective cavity insulation, moisture that enters from outside during wet weather can cause blistering on the internal painted surface as it attempts to dry out.
The important thing to understand about blistering paint is that it cannot be successfully repainted without addressing the moisture source first. Popping the blisters, filling, and repainting is a temporary cosmetic fix that will repeat itself, usually within a single season, if the underlying moisture is still moving through the wall.
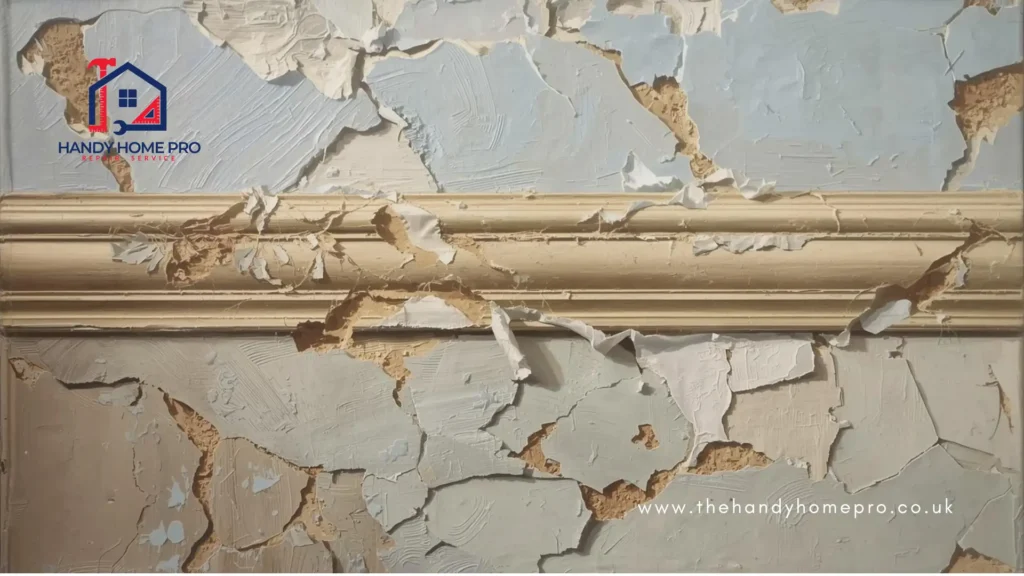
What Causes Paint to Crack, and Is It Always a Problem?
Cracking in paint covers a range of different patterns with different causes and different levels of concern behind them.
Hairline Crazing From an Overly Thick Coat or Fast Drying
Fine crazing or alligatoring, where the paint surface develops a network of very small cracks resembling a dried riverbed, is usually caused by the paint itself rather than the substrate. Applying paint too thickly in a single coat, painting in very warm or draughty conditions that cause the surface of the paint to dry before the layers beneath have cured, or applying a top coat before the undercoat is fully dry can all produce this effect.
This type of cracking is essentially a product of poor application technique. It does not indicate a structural problem with the wall and can generally be resolved by stripping back to a sound surface and repainting with correctly applied, properly thinned coats.
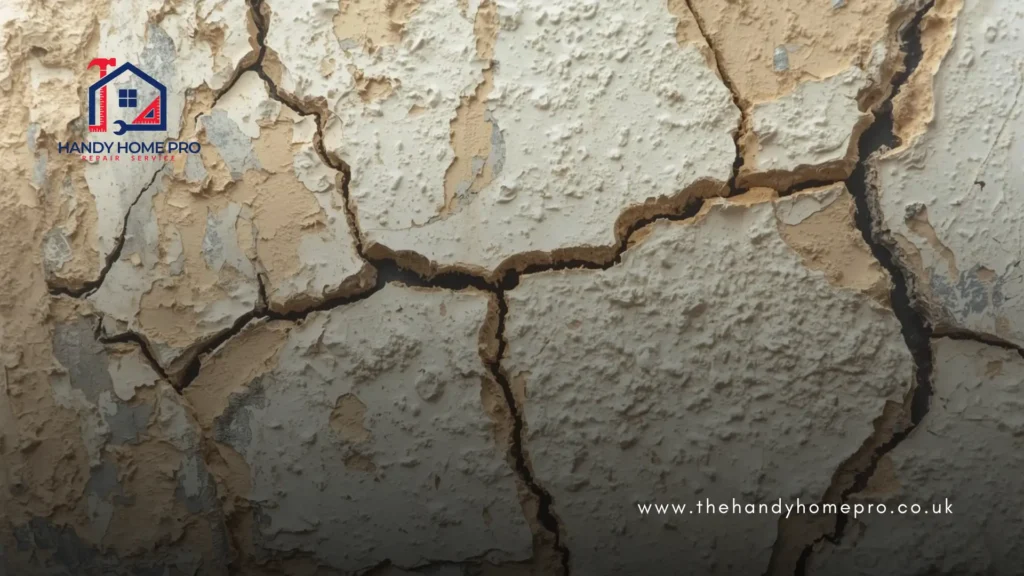
Settlement Cracks in the Underlying Plaster
Fine cracks that follow a more linear pattern, particularly on ceilings or at the junction between walls and ceilings, are often caused by settlement movement in the plaster or in the building structure. In older properties, plaster applied directly to the brick or to wooden laths can develop settlement cracks over decades as the building shifts very gradually. These cracks may be stable and cosmetic, or they may be slowly widening.
A crack that has been filled before and has reopened in the same place is almost always a moving crack rather than a settled one. Filling it again with the same material in the same way will produce the same result. A flexible filler or an appropriate jointing compound, applied correctly and given time to cure before painting, will perform better in these locations.
Movement Cracks That Reappear After Filling
Some cracks in painted surfaces are caused by movement in the building fabric that continues over time. Where this is the case, any rigid fill will simply crack again as the movement continues. The question to ask about a crack that has returned is whether the movement behind it has stopped or is ongoing. A crack that opens and closes with the seasons is responding to thermal or moisture movement in the building. One that opens progressively without reversing is worth getting a professional to look at, particularly if it follows a diagonal path at the corner of a door or window opening.
Most cracks in UK homes are cosmetic rather than structural. But the distinction matters, and the advice about cracks that may signal structural movement should be taken seriously. If you are not sure whether a crack is cosmetic or significant, the sensible step is to have it assessed before decorating over it.
How to Tell Whether the Issue Is the Paint, the Plaster, or Something Deeper
Before you begin any preparation work, it is worth taking ten minutes to assess the wall properly rather than going straight to filling and sanding.

Run your hand across the wall and look for areas that feel soft, spongy, or damp. Sound, dry plaster should feel firm and consistent. Soft spots usually indicate a moisture problem. Tap the wall lightly across the affected area with a knuckle. Sound plaster gives a fairly solid, slightly dull knock. Plaster that has come away from the wall behind it, known as blown plaster, gives a noticeably hollow sound and may flex slightly under light pressure.
Check the edges of any peeling or cracked areas. If the paint lifts away easily and the surface beneath looks intact and dry, the failure is likely in the paint layer itself. If the plaster beneath the paint is also soft, crumbling, or discoloured, the repair goes deeper than the surface.
Look at the pattern of the problem. Peeling or blistering confined to one area of a wall, particularly around a window, pipe, or external-facing section, points toward a localised moisture source. Widespread peeling across an entire room surface is more likely to be a preparation or paint-compatibility issue.
Check whether the problem is seasonal. A wall that dries out in summer and shows moisture-related paint failure in autumn and winter is responding to condensation or penetrating damp that arrives with the colder, wetter months.
What Needs to Be Fixed Before You Pick Up a Brush
Addressing Any Underlying Moisture Source
If moisture is behind the paint failure, it must be dealt with before any new decoration begins. This may involve fixing a plumbing fault, resealing a bathroom, improving ventilation, or dealing with a penetrating damp problem in the building fabric. Applying new paint to a wall that is still damp or still receiving moisture from behind will produce exactly the same failure in a shorter time.
Stripping Back to Sound Material
Surface preparation for a wall with paint failure should begin by removing everything that is not securely adhered. Loose paint, flaking sections, and blown plaster all need to come off before anything is applied on top. Painting over loose material is not preparation: it is just a way of hiding the problem until the new coat fails in the same places.
A scraper and a heat gun or steam stripper can remove multiple layers of old paint where necessary. Where plaster has blown across a section of wall, that section needs to be cut back to solid material and made good before the painting stage can begin.
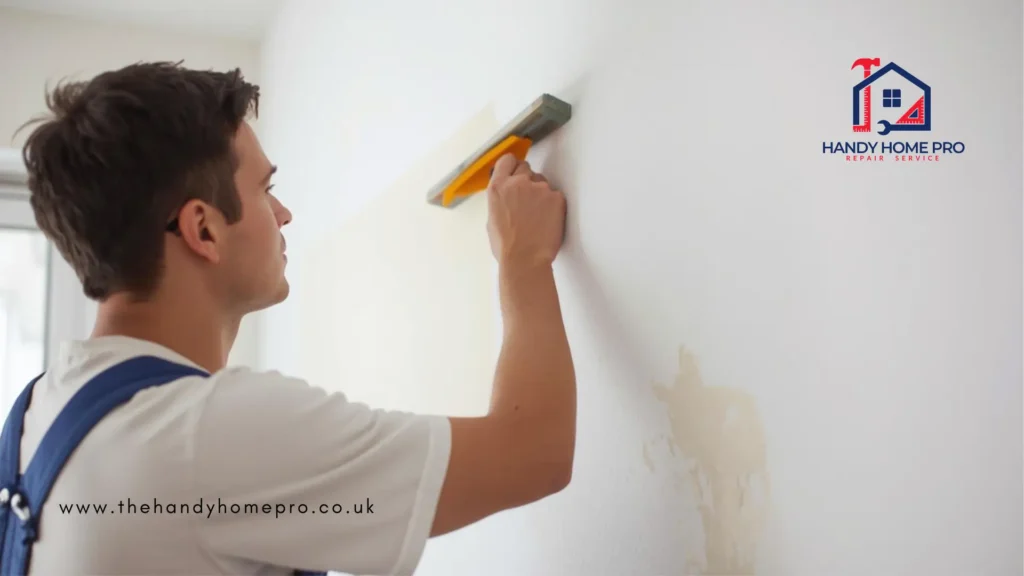
Filling, Priming, and Preparing Correctly
Once the surface is sound and clean, any holes or cracks should be filled with an appropriate filler, allowed to dry fully, and then sanded flush with the surrounding surface. The preparation stage is where the patience pays off: a fill that has been rushed, painted over before it has fully hardened, or not sanded smooth enough will be visible through any number of finish coats.
A coat of appropriate primer or sealer applied to the prepared surface before the finish coats improves adhesion, evens out porosity, and gives the finish paint a consistent base to work from. Skipping this step on a patchy or heavily repaired surface is a common shortcut that shows up in the final result.
Sealing Bare Plaster
Where plaster has been repaired or replaced, or where a room has been freshly plastered throughout, the plaster must be sealed correctly before painting. New plaster is highly alkaline and very porous, and it will absorb the water from standard emulsion paint unevenly, leaving a patchy, unstable surface. A mist coat, which is standard emulsion diluted with water to a thin consistency, is applied first to seal the plaster and give it time to absorb an initial coat before the finish coats go on. This step is not optional for newly plastered surfaces: skipping it is one of the most reliable ways to produce a finish that starts to peel within months.
When the Wall Itself Needs Professional Attention First
There are situations where a wall cannot be prepared and painted to a satisfactory standard without professional work being carried out first.
If a significant area of plaster has blown, crumbled, or separated from the wall, it needs to be removed and re-skimmed by someone with the skill to produce a flat, consistent surface. Patching blown plaster with filler is not the same as replacing it. A filled patch over a blown area will feel different underfoot, look different in raking light, and will not take paint in the same way as the surrounding surface.
If a ceiling has suffered water damage from a leak above, even if the leak has been fixed, the affected plasterboard or plaster often needs to be replaced rather than simply dried and painted. Water-damaged plasterboard loses its structural integrity and, in many cases, its surface paper delaminates, meaning paint applied over it will not bond correctly regardless of how much preparation is done.
If cracks are recurring in the same location, particularly diagonal cracks at door or window openings, the cause of the movement should be investigated before decoration proceeds. Filling and painting over an active crack simply means the crack comes back through the new finish, and if the movement is significant enough, the subsequent repair is more extensive than if it had been caught earlier.
Our plastering service covers the full range of plaster repair, patching, and re-skimming work that is needed before surfaces can be finished to a proper decorating standard. Where walls need both plaster repair and decorating, it makes sense to address both in a coordinated sequence rather than trying to manage them separately.
What Good Preparation Actually Involves
Why the Preparation Stage Takes Longer Than the Painting
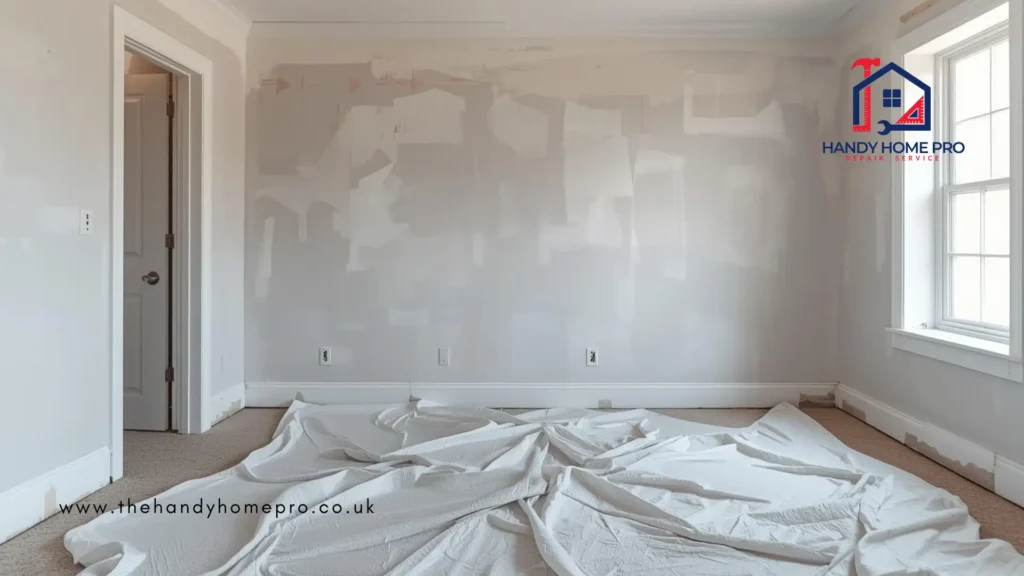
A room that is being properly prepared for redecorating will spend significantly more time in the preparation stage than in the painting stage. This comes as a surprise to many people, and it is the reason why professional decorating costs more than a tin of paint and a weekend.
The preparation work includes assessing the whole surface, stripping back anything that is not sound, filling every crack and hole in the correct sequence, sanding the fills back, applying primer or sealer where needed, and allowing each stage to dry before the next begins. The painting itself, once a properly prepared surface is ready, goes on relatively quickly and evenly.
Cutting this process short produces a result that looks acceptable at first glance, because fresh paint looks fresh regardless of what is under it, but that shows its defects within a relatively short time as the unresolved issues beneath begin to work through the surface.
The Difference Between a Finish That Lasts and One That Does Not
A finish that lasts is achieved through the combination of a sound, dry, properly prepared surface and quality paint applied correctly in the appropriate number of coats for that surface type. Each of those factors matters. A good paint over a poorly prepared surface will fail. A properly prepared surface with an inadequate or inappropriate paint will not hold up.
For rooms that see high moisture, such as bathrooms and kitchens, the choice of paint matters as well as the preparation. A standard emulsion applied to a bathroom ceiling without the level of moisture resistance the environment demands will deteriorate faster than one specified for high-humidity use. This is not about spending more on premium products for the sake of it: it is about matching what is used to what the surface will be asked to do.
Good preparation is also what protects any investment in decorating. A room freshly decorated to a professional standard, with properly prepared surfaces and appropriate materials throughout, should look well and remain stable for years. That is what makes the effort of doing it properly worthwhile from the outset.
You can read about how we approach this kind of work, including what a professional decorating and preparation visit involves, on our About page. If you have questions about what a job might involve or how bookings work, the FAQs cover the most common queries.
Is It Worth Doing It Properly or Cutting Corners?
The honest answer is that cutting corners in preparation almost never saves money in practice, because the saving on the original job is usually smaller than the cost of doing the job again when the surface fails.
The pattern is very consistent. A homeowner patches a wall with filler, sands it lightly, and applies two coats of paint. It looks fine for a while. But if the plaster beneath the patch was blown, if the filler was applied too thickly and has not dried evenly throughout, or if the moisture that caused the original problem is still present, the surface will begin to show those problems again within a season or two. At that point, the repair needed is usually more extensive than what would have been required the first time, because the new paint layer has bonded to the failed material beneath it and needs to come off as well.
Doing this once properly, with the surface stripped back to sound material, plaster repaired where needed, moisture resolved at source, and paint applied over a correctly primed and prepared substrate, produces a result that holds. Our decorative works service is built around this approach: addressing what needs fixing first and then producing a finish that is worth the effort of getting right.
For properties with multiple rooms that need attention, or where surface repairs and decorating work are running alongside other maintenance, grouping jobs into an organised visit through our general maintenance service is often the most cost-effective approach, because preparation work, plaster repairs, and decorating can be sequenced correctly rather than tackled in isolation.
If your walls are showing signs of paint failure and you are planning to redecorate, the sensible first step is to understand what is behind the problem before committing to materials and labour. We cover surface assessment, preparation, plaster repair, and decorating across North London, Hertfordshire, and surrounding areas. Get in touch through our contact page and we will give you a straight answer on what your walls actually need before you redecorate.