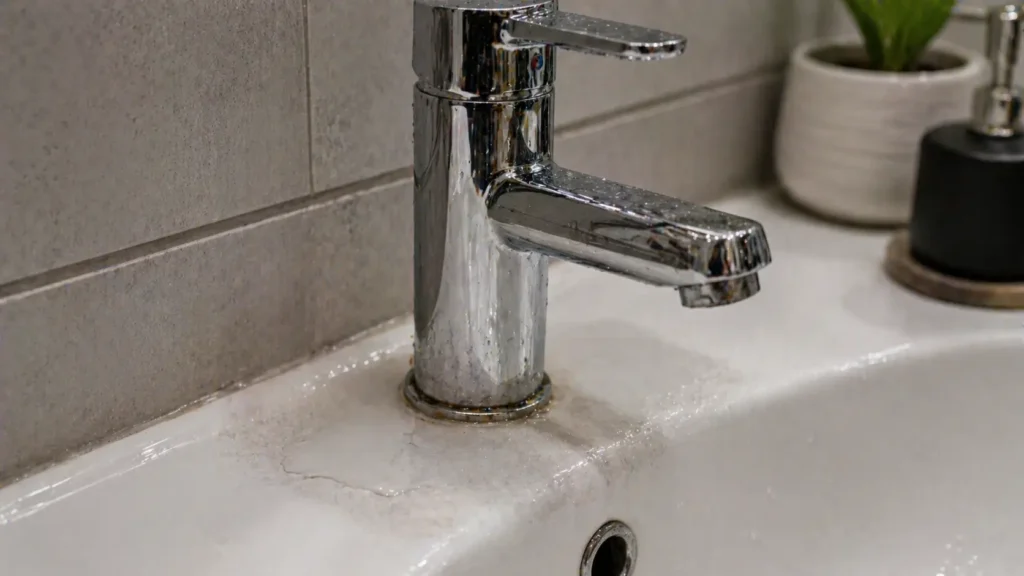
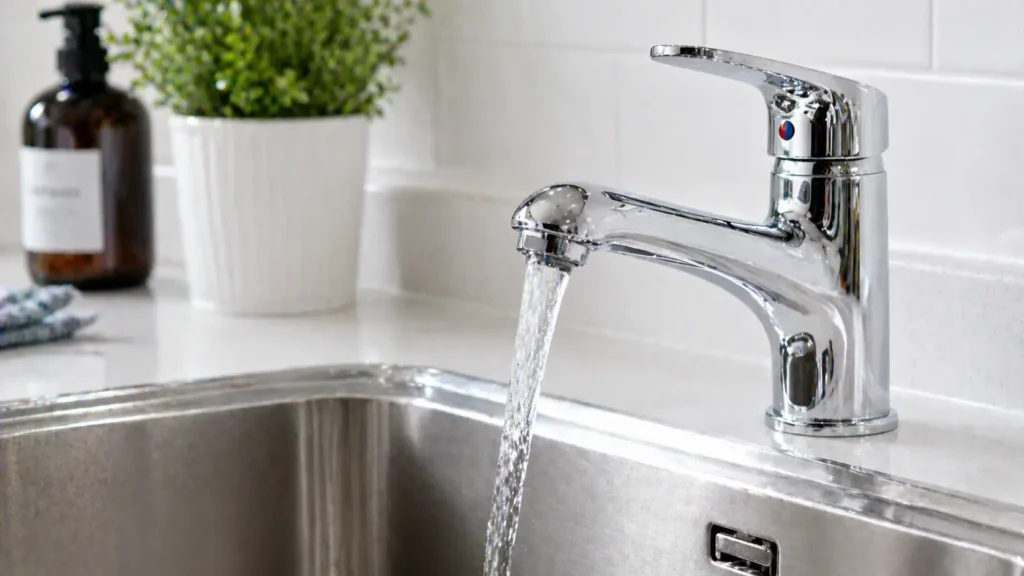
That constant drip-drip sound from your tap is not just annoying – it actually costs you money. That constant dripping sound from your faucet isn’t just annoying – it’s actually costing you money. A leaky faucet can waste a surprising amount of water every day, and over time, it can add up to a hefty bill. The good news? In most cases, you don’t need to call a plumber. With a few basic tools and a little patience, fixing a leaky faucet is something most people can do at home.
This guide explains everything you need to know – from understanding why faucets leak to a complete step-by-step tap washer replacement. Let’s get started.
Why Is Your Tap Leaking?
Before you grab your tools, it helps to understand what’s really going wrong with your faucet. Most of the time, the cause is one of a few common problems.

- Worn-out washer – This is the most common cause of a leaky faucet. Inside every traditional faucet, there is a small rubber washer that presses against a fixed “seat” to prevent water from flowing when the faucet is turned off. Over time, constant use wears out the washer. Once it loses its shape, water will leak through it and can cause the faucet to leak.
- Damaged O-rings – These are small rubber rings found in the faucet body that prevent water from dripping around the faucet or handle. When they become old or cracked, you may start to see dripping at the base of the faucet, not from the faucet.
- Corroded valve seat – Mineral deposits from the water can slowly build up on the valve seat inside the faucet. This buildup causes the seal between the washer and the seat to fail, causing leaks near the faucet area.
- Faulty ceramic disc – Modern faucets often use ceramic discs instead of washers to control water flow. If gravel or debris gets stuck between the two discs, they can’t close properly and the faucet starts to leak.
- High water pressure – Sometimes the faucet itself is fine, but the water pressure in your home is too high. This puts extra stress on the faucet’s components and can lead to leaks, especially if you only notice the leak at certain times of the day.
- Loose connections or poor installation -If your faucet isn’t fitted tightly or plumber’s tape isn’t used properly on the fittings, water will continue to drip from the joints over time.
Understanding which of these is causing your leak helps you fix it correctly the first time.
How to Spot the Signs of a Leaking Tap
Sometimes a faucet will start to leak slowly before you even notice it. Keep an eye out for these warning signs:
- A continuous dripping sound, even when the tap is fully closed
- Water stains or a damp patch around the base of the tap
- Uneven or reduced water flow when the tap is turned on
- A slow rise in your water bill with no obvious explanation
If you notice any of these, it’s time to investigate and take action before the problem gets worse.
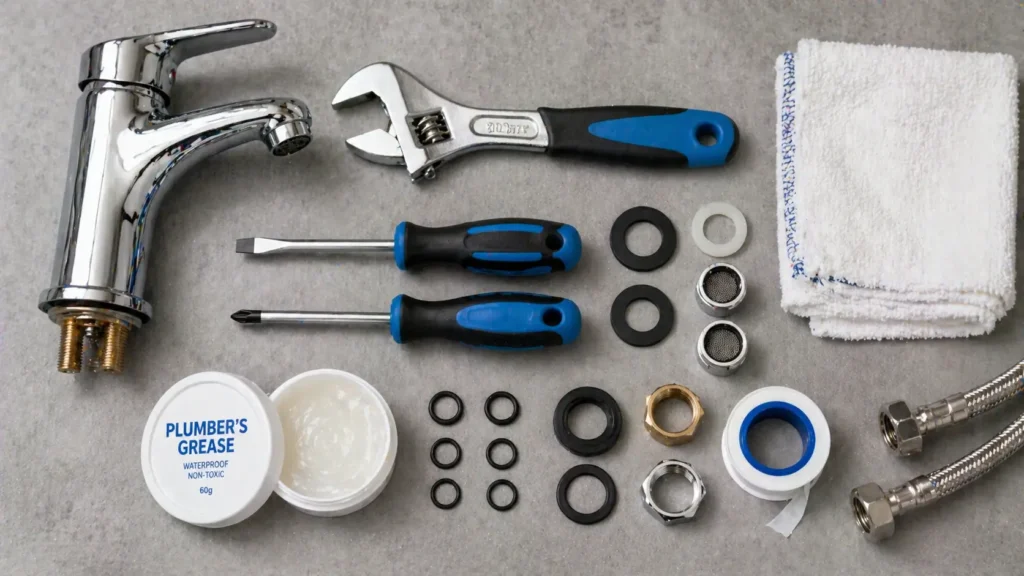
Tools You Will Need
You do not need a full toolbox to fix a leaking tap. Here is what to gather before you start:
- Flathead and crosshead screwdrivers
- Adjustable spanner or wrench
- Replacement tap washer (or O-ring, depending on your tap type)
- Plumber’s grease or silicone grease
- A cloth or old towel
- Duct tape (to wrap spanner jaws and protect chrome finishes)
Make sure you purchase the correct size replacement washer before disassembling your tap. Taking the old washer with you to the hardware store is the easiest way to get a proper match.
Further Reading: How To Remove Wallpaper: Tips & Process (A Complete Guide 2026)
Before You Begin: Turn Off the Water Supply
This step is essential. Before you touch anything on your faucet, you need to turn off the water supply.
Most modern homes have isolation valves on the pipes directly under the sink or basin. These are small valves with a slot in them – turning the slot 90 degrees (so that it doesn’t go to the side of the pipe) will shut off the water to just that faucet. This means you don’t need to turn off the water to the entire house.
If your home doesn’t have an isolation valve, you’ll need to turn off the main stopcock, which is usually found under the kitchen sink or where the water supply enters the house. After turning it off, turn on the faucet you’re repairing to flush out any water stuck in the pipes.
After turning off the water, place a cloth in the sink to catch any small parts and cover the plug hole so that nothing disappears down the drain.
Step-by-Step: How to Change a Tap Washer
- Step 1 – Remove the tap handle:
Find a small cover above the tap handle – it usually has an “H” for hot or a “C” for cold printed on it. Carefully pry it open with a flathead screwdriver. Underneath, you’ll find a screw. Undo that screw and lift the handle straight off.
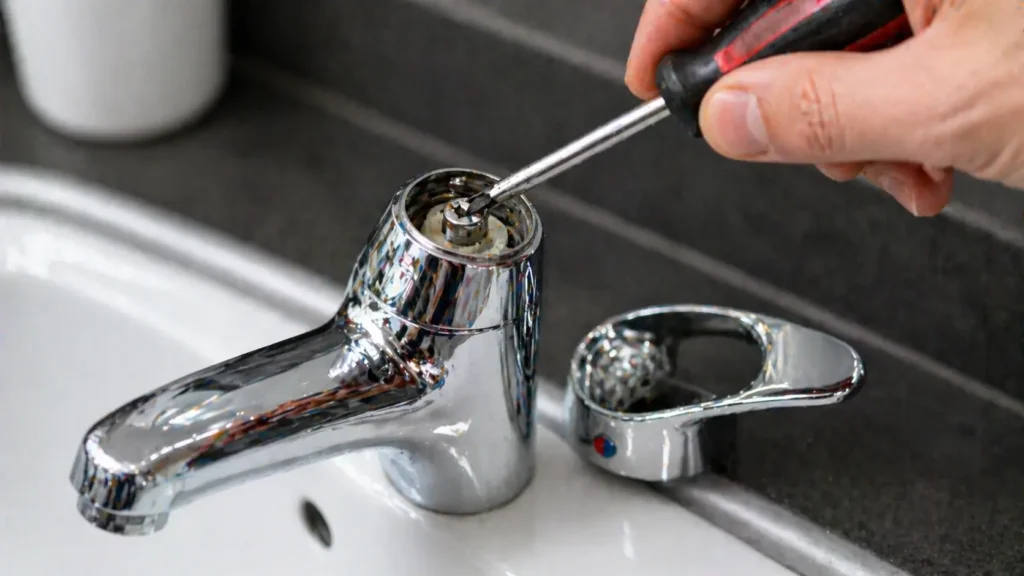
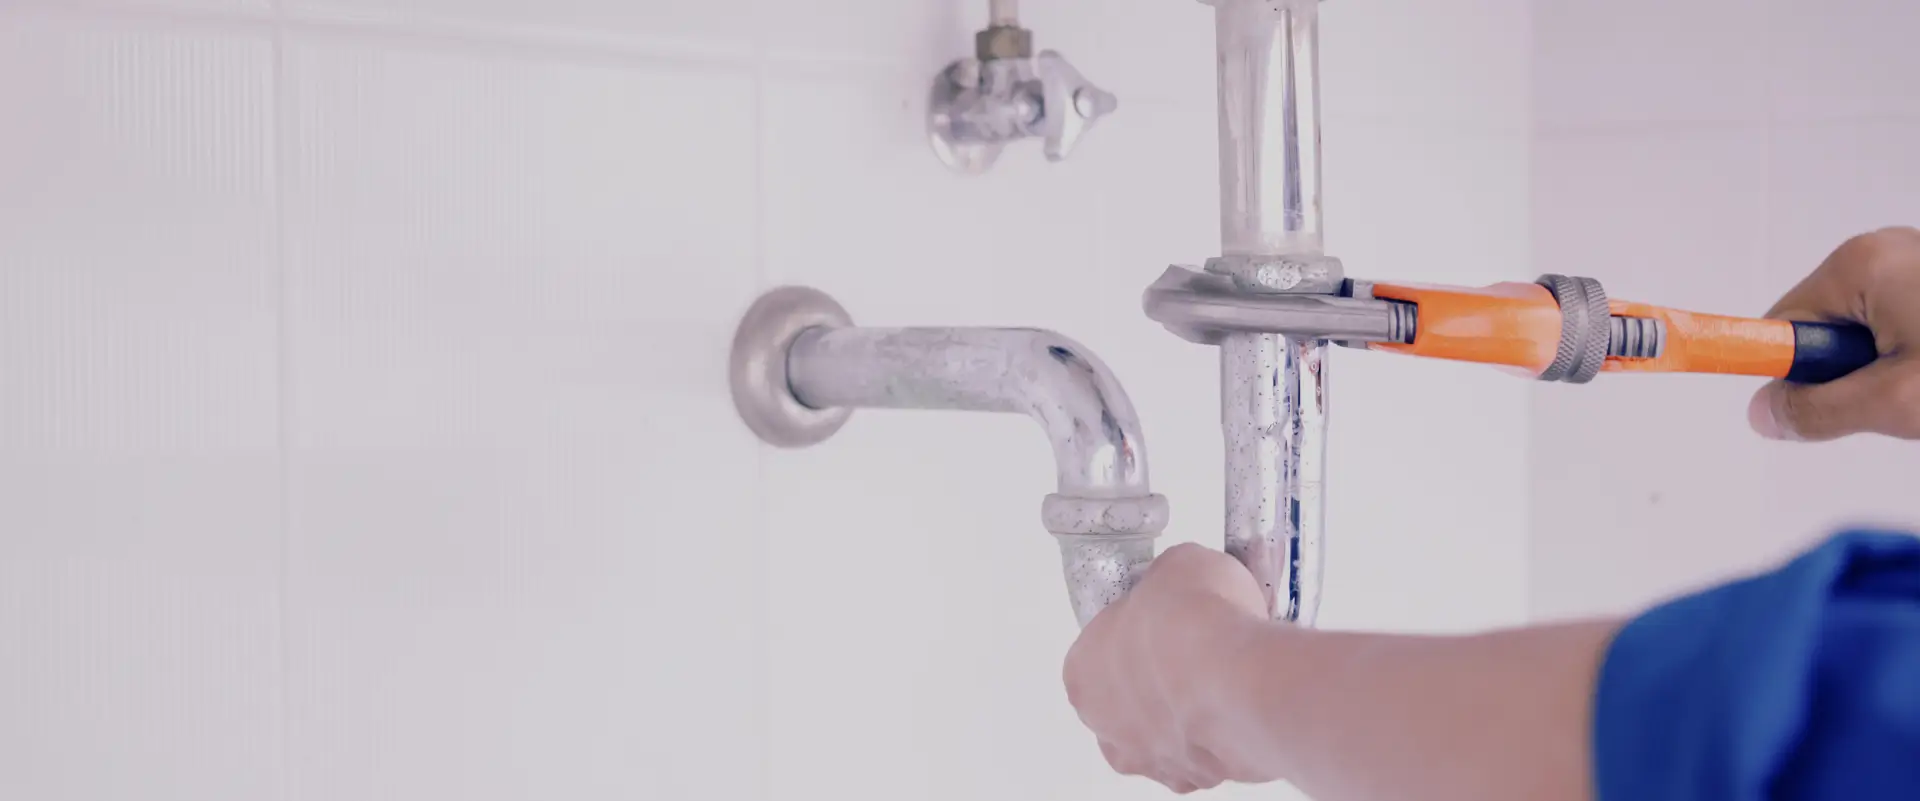
- Step 2 – Remove the headgear:
With the handle off, you can now see the inside of the tap. There will be a large hex nut (called the headgear nut) holding the valve in place. Use your adjustable wrench to loosen and remove this nut. Wrap the jaws of the wrench with duct tape first to protect any chrome or polished surfaces.
- Step 3 – Access and remove the valve:
Once the headgear nut is off, lift the valve (also called the spindle). At the bottom of the valve, you’ll see a washer. It’s usually held in place with a small brass nut or retaining clip.
- Step 4 – Replace the washer:
Turn the nut or clip and remove the old washer. Compare it to your new washer – it should be the same size. Fit the new washer in place and secure it. Using the wrong size washer will make the leak worse, not better, so double-check before reassembling.
- Step 5 – Reassemble the tap:
Reverse the steps to put everything back together. Screw the headgear nut back on, refit the handle, and replace the cover cap. Don’t overtighten anything – there’s enough strength. Overtightening can damage the new washer immediately.
- Step 6 – Turn the water back on and test:
Slowly reopen the isolation valve (or main stopcock if you used one). Allow the water pressure to build up slowly. Then turn the tap on and off a few times to make sure everything is working. There should be no more dripping.
Fixing a Ceramic Disc Tap: A Slightly Different Approach
If you have a modern single-lever mixer tap or a tap with quarter-turn handles, it probably uses ceramic discs instead of the traditional rubber washer. The fix process is similar but slightly different.
In this type of tap, the cartridge has two ceramic discs that slide against each other to control the flow of water. If grit gets stuck between them, it may not close completely.
To fix it, follow the same steps to remove the handle and access the cartridge. Once you have the cartridge out, you can often clean it by running water through it or gently wiping the surface of the disc. If the disc is cracked or damaged, the entire cartridge will need to be replaced. Make sure you buy a replacement that matches your tap brand and model.
Tips to Prevent Your Tap from Leaking Again
Once your tap is fixed, a bit of regular care goes a long way:
- Do not overtighten your taps. Many people believe that turning the faucet as hard as possible is the right way to turn it off. In fact, this is one of the main reasons washers get damaged. Turn the faucet firmly but gently until the water stops flowing.
- Check taps regularly. Take a look at all the faucets in your home every few months. It’s much easier to catch a small leak sooner than a faucet that’s been neglected for six months.
- Flush new taps when installed. When a new faucet is fitted, there may be small pieces or sediment left inside from the manufacturing process. Running water through the faucet before the first use helps to clean it and prevents the ceramic disc from getting damaged in the first place.
- Use plumber’s grease on rubber seals. When replacing washers or O-rings, apply a small amount of silicone grease to the new seal before fitting it. This helps it seal better and slows down the wear and tear process.

At The Handy Home Pro, we always recommend keeping a small pack of different types of faucet washers in your home toolkit. They’re inexpensive, take up almost no space, and mean you can fix a drip as soon as you see it.
When to Call a Professional?
Most leaking taps are straightforward DIY jobs. However, there are times when it is better to bring in a plumber:
- The leak is coming from the pipes behind the wall or under the floor
- You have already replaced the washer but the tap is still dripping
- The tap body itself is cracked or corroded
- You are not confident about shutting off or restoring your water supply safely
There’s no shame in calling a professional when a job goes beyond basic DIY. A licensed plumber can diagnose problems that aren’t visible and ensure that repairs are made.
You may also like: How to Apply Silicone Sealant: A Step-by-Step Guide
The Real Cost of Ignoring a Leaking Tap
It’s easy to put off fixing a leaking faucet, especially if it seems minor. But a faucet that drips just once per second can waste thousands of gallons of water over the course of a year. It shows up on your water bill and it’s also a waste of a valuable resource. Fixing a leaking faucet is one of the easiest and most cost-effective home repairs you can make.
The Handy Home Pro team has seen countless cases where a small drip was ignored for months, only to turn into a major plumbing problem. The sooner you act, the easier and cheaper the repair will be.
Frequently Asked Questions:
If the leak is coming from the spout (the part where the water flows), the washer is usually the cause of the problem. If the water is leaking around the base of the faucet or near the handle, the O-ring is more likely to be the cause.
Yes, in most cases. If your home has an isolation valve (small valves on the hot and cold pipes) under the sink, you can use it to shut off the water to just one faucet without affecting the rest of your home.
A tap washer usually lasts for several years, but its lifespan depends on how often the faucet is used and how hard the water is in your area. Hard water areas tend to wear out washers more quickly due to the mineral content in the water.
The most common sizes for household taps in the UK are 1/2 inch and 3/4 inch. The safest way to get the right size is to take the old washer with you to a hardware store and physically match it up.
If the tap part is in good condition and the problem is simply a worn washer or O-ring, then it is definitely worth repairing. However, if the tap is very old, heavily corroded, or the problem is recurring, replacing the entire tap may be the smartest long-term option.
The valve seat inside the tap may be damaged or corroded. A worn seat means that even a brand new washer won’t make a proper seal. A plumber can resurface or replace the valve seat, which will fix the problem. Alternatively, check that you’ve fitted the correct size washer.
Conclusion:
Fixing a leaking faucet is one of those home repairs that feels surprisingly satisfying once it’s done. The tools are simple, the cost is low, and the result – peace of mind, savings and a working faucet – is well worth the effort. So the next time you hear that dripping sound, don’t ignore it. Now you know exactly what to do.